Keep Clip™ Installation Instructions
Installation shall be in full accordance with the manufacturer’s instructions and recommendations
outlined in ASTM Specification C636-76.
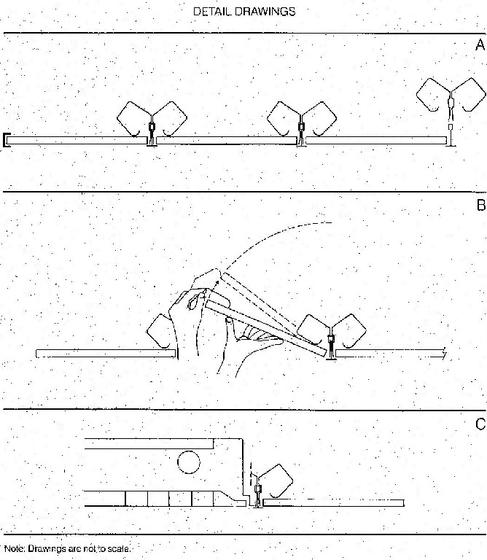
1. The Keep Clip™ requires approximately 10 inches of unobstructed plenum space for proper function of ceiling panels and clips upon impact.
2. Install wall angle molding on two parallel walls. The Keep Clip™ must be installed parallel to these walls.
3. Install wall channel or double angle molding on the other two walls. The clips will be perpendicular to the wall channel.
4. Install main runners 4′ on center, with 4′ and 2′ cross tees forming 2′ x 4′ or 2′ x 2′ modules.
5. Install ceiling panels and clips, starting at a wall with wall channel or double angle molding. Work in progression, out from that wall, installing panels, then clips. (see figures 1 & 2 & Detail A)
6. After all components except the last panel have been installed, lift up one side of the clip and insert the panel beneath. (Detail B)
7. When installing panels and clips next to recessed lighting fixtures, cut off one side of the clip and install as shown. (Detail C)
8. For initial plenum access, push up any panel on either side until the clip becomes visible. Lift the clip from the panel as shown (Detail B)
9. After plenum access has been gained, the remaining panels can be easily moved and repositioned from the plenum.